Openbox

Quick dashboard in focus view

In Focus or main view, you can quickly show a chart for any item on the screen. Just select the item and click F11 (the chart shortcut key in Excel), or click the small bar chart icon at the bottom right of each item.

You can show as many charts at a time as you like. 

If you move the mouse over a chart, you will see the numerical values appear.

To remove a chart, click the bar chart icon again. 

Note that you must already have created the preview (e.g. by clicking F9) because this calculates the results that are displayed in the charts.

Circular references

A circular reference is where a calculation refers to itself directly or indirectly. For example, it’s easy to accidentally create one with interest, which is cash times an interest rate, but since interest is paid from cash, cash depends on interest which in turn depends on cash. Modellers know to avoid this by calculating interest from cash before interest, but sometimes circular references aren’t so obvious or so easy to avoid.

Detecting circularities

Openbox will automatically detect and warn about circular references during validation . It will tell you whether there are any and which calculations are involved. Note that it will detect all circularities but only tell you about one at a time. 

Dealing with circularities

Circular references are generally seen as bad practice in financial models. The options here are:

  1. Change the formulas to remove the circularity – for example, by using opening balances rather than closing balances. You will need to judge whether this is a reasonable approximation for your modelling.
  2. Ignore it and build the model anyway
  3. Use a copy/ paste block with associated macro to iterate the model. This is the standard option.

For Option 3, you need to specify where to break the circularity – at which calculation. In a future version of Openbox, it will suggest where to break it.

Openbox will then add new items with “copy” and “paste” suffixes, and a macro. When you get to the Excel model, you press a button to run the macro. It calculates the spreadsheet, then copies the  values in the “copy” cells and pastes them into the “paste” cells. Then it calculates again and checks if the “copy” cells have changed. If they have not changed (much) then it stops, otherwise it repeats the process. This should make your model converge to the expected answer.

This is an expert feature, and we recommend you familiarize yourself with the approach before using it. You can find more information in the Financial Modelling Handbook here

Breaking circularity manually

If you know already that your model contains a circularity, you can break it by right clicking on the calculation you want to break it at, and selecting “Break circularity”. 

Openbox will insert copy/ paste blocks, and the circularity macro, as described earlier.

Ignoring the circularity

While building models with a circularity isn’t best practice, we recognise that sometimes you might want to do it. So you can click “Ignore” in the circularity window, and Openbox will create the model anyway. You can then use Excel’s iterative calculation mode. 

Note that the Openbox circularity detector is more cautious than the one in Excel. So sometimes, Openbox will highlight a circularity that Excel doesn’t. For more information on this advanced topic, click here.

Circularity in the preview

When Openbox creates a preview of a model with a copy/ paste macro, it will ask you if you want to run that macro.

For very large models, this could take 30 seconds or more, because the model has to be recalculated many times.

Troubleshooting

Because the “copy” and “paste” blocks are standard Openbox calculations, they could be modified or deleted. If this happens, Openbox will warn you during validation.

As part of the process, Openbox tries to insert VBA into your model, as noted above. Excel’s security settings can prevent this. To allow access:

  1. Open Excel
  2. Click “File” then “Options”
  3. Click “Trust Center” then “Trust Center settings”
  4. Click “Macro settings”
  5. Tick the “Trust access to the VBA object model” box.
  6. Click OK as necessary until you get back to the main Excel window.
  7. Close and restart Excel.

Note that this can cause security risks, so please confirm with your organization before doing it. We only offer these steps as information and don’t take responsibility for any consequences.

See https://answers.microsoft.com/en-us/msoffice/forum/all/trust-access-to-the-vba-project-object-model/fb184cc1-ea20-443d-9a2a-9d68e6ef7564 for more information.

Apply the FAST standard

By default, Openbox applies the FAST Standard to all models. But you can fine tune how the standard is applied, or turn it off entirely.

This is controlled from the “Standards” tab of the Openbox settings. From the main Openbox window, click “Help and Settings” then “Openbox settings”. The settings window will appear. Click “Standards” and it should look like this:

Taking the options from the top:

FAST Block structure

Toggles whether the FAST standard is used at all. If it is, then the key block structure of FAST – where the ingredients of each formula are linked directly above the formula itself – will be used.

If you untick this box, the resulting spreadsheet model will be closer to other spreadsheet standards.

Use live labels

When Openbox inserts a link to a formula ingredient, it will insert a link to the name of the ingredient – so if that name changes, all references to it will update in Excel.

Color exporting formula red

If a formula is used on another worksheet, the FAST standard says that it should be colored red. You can turn this on or off – or change the color – by ticking and unticking this box. Each time you tick it you will be shown a color picker. You can simply press Cancel if you want to stick with the existing color.

Color importing formula blue

As above except it is where a formula refers to a cell on another sheet. The standard FAST color is blue.

Color intra-sheet counterflows gray

 Rows where the formula refers to a cell below it on the same sheet have a gray background in the FAST standard. You can turn this on or off.

Pyramid structure for blocks

There are two choices for how formula ingredients are ordered. The standard approach is the same order as in the formula. However you can tick this box to choose the pyramid structure (constants first, then series) instead.

7 Row Balances

Uses the 7 row layout for balances (initial balance, flag, opening balance, inflow, outflow, closing balance, sign switch line) rather than a 4 row balance.

Sign switch line should be below main corkscrew

Otherwise, it will be inside the corkscrew borders.

Row anchor all links

As per the FAST standard, all ingredients that link to other calculations should have a $ sign in front of the row number.

Apply FAST colours and number formats

The standard prescribes certain formats (e.g. 0.0000 for factors) and these will override any formats you might set in the model, unless you untick this box.

Spacer rows between ingredients

Inserts a blank row between each ingredient in a FAST block

Spacer row after ingredients

Inserts a single blank row between ingredients and the main formula in the FAST block

Shrink spacing rows

Set the row height of spacing rows (measured in normal Excel height)

Other Standards settings

Add a totals column to all flows

Adds a total column to all calculations, except where it does not make sense, such as balances or percentages.


Spaces between arguments

Instant mode

Instant mode is probably the easiest way for people coming from spreadsheet modelling to get straight into producing models in Openbox. It allows you to edit in a spreadsheet, but using the power of Openbox to go faster.

Start with any model in Openbox. Press “Preview” (or the F9) key to display the spreadsheet preview, like so:

You can add calculations to the preview, in a very similar way to you would in Excel.

Step 1: Type the name of the new calculation in the name column. This is usually column E.

Step 2: click in any other column and press Shift+F2. Notice that the Openbox formula bar has become active.

Step 3: Type what you want the formula to be, using Openbox language. In this example, “Accounts receivable” minus “Accounts payable”.  Create or change a calculation gives more detail.

Openbox has taken the formula you typed and inserted the corresponding spreadsheet formulas, titles and headings. It has brought in the two ingredients, accounts receivable, accounts payable and added the “Net working capital” calculation which you would have typed in Excel as J130 – J131. It has also copied across of course.

There is also a “Net working capital” item in the Openbox main window.

You can do this anywhere in the preview.

In the same way as usual, if you include new calculation names in the formula, Openbox will offer to add placeholders for them.

You can also edit existing items. Suppose you wanted to change the “Net working capital” formula. Click in any cell in row 132 and press Shift+F2, then type a new formula and press Enter.

Show a calculation’s precedents and dependents

From the Main window

First, select the calculation you want to see the precedents and dependents for. Then click the “Focus Mode” tab or press Ctrl+Shift+M (M for Mode).

From the Preview

Select the name of the calculation you want (usually in column E). Then press Ctrl+ [, which is the “go to precedent” shortcut in Excel.

Customising Focus mode

The focus mode initially shows only the immediate/ direct precedents and dependents of a calculation. You can show more of the model by clicking the “+” buttons. “+” buttons to the left show precedents, and “+” buttons to the right show dependents.

You can also hide parts of the view by clicking the “-” buttons. These will hide everything to the left or right of them.

Openbox animates these changes, so you can see what is happening. You can speed up or slow down the animations by dragging the animation slider. You can also zoom the view in and out using the controls at the base of the diagram. And finally, you can turn the view to flow top to bottom rather than left to right by clicking the “down” arrow below the focus view. 

To move the view around, click the screen, hold the mouse button down, and drag.

Sometimes, the diagram can become too complex. To recentre on the selected item, press Ctrl+0 (zero).


How to change the width of columns

Column widths will initially be set to those in the formatting template.  The formatting template is initially set to the “Gridlines template.xlsx” file in your OBXComponents folder in your Documents folder.

To change column widths, open that template file in Excel and adjust the column widths as desired. Then save it. You can save it under a different name but you will then need to tell Openbox to use this new template file. See Changing how inputs and calculations are laid out for how to do this.

Note that you can also tell Openbox to autofit columns to their contents. This is an option in the main Openbox settings window. Again, see Changing how inputs and calculations are laid out  for more detail.

What checks does Openbox do as part of validation?

Openbox performs a number of checks on each model before it is translated into a spreadsheet. They are designed to catch many of the most common errors in models. 

The checks run whenever you build a model. You can also force them to run by pressing “Validate” on the Spreadsheet menu, or pressing Shift+F9. 

Of course, this does not remove the need to check any results manually.

Validation warnings

If the validation process finds any issues, it will warn you in a pop up window. You have the option to ignore the issues, or to stop validation and fix them. If you choose to stop, the validation warnings will appear in a new window to the right of the main Openbox window, as shown below.

Example of validation window

Each row is clickable, and when clicked the main window will scroll to show where the issue is. 

You can show or hide the validation window by clicking “Spreadsheet” then “Show/ Hide issues”.

Let’s now look at the key validation checks that Openbox does.

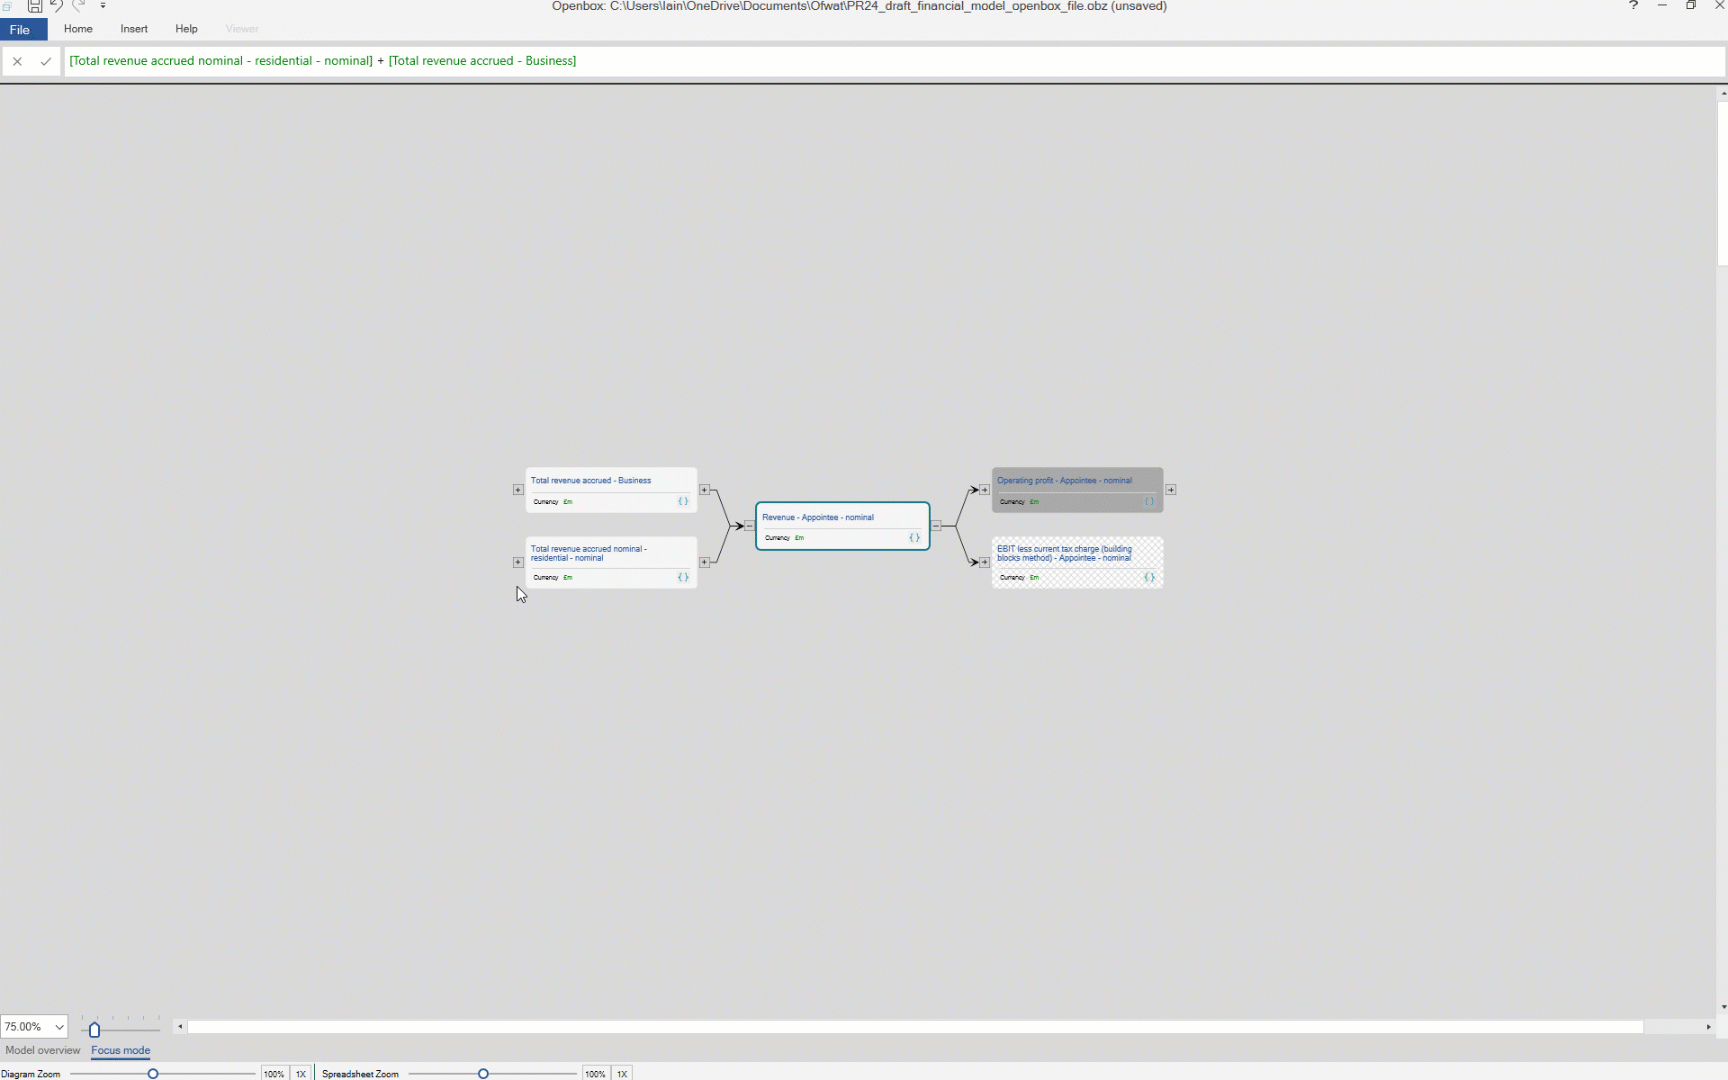
1. Missing calculations

Sometimes, you can have a formula that refers to a calculation that doesn’t exist. Mostly, Openbox prevents this, adding and removing placeholders to keep the model consistent. However, it is possible to delete an item from the model, and then anything that depended on that item will have an invalid equation. This is the equivalent of a #REF! error in Excel. Openbox will warn you when deleting items, and will ask you if you want to add a placeholder, if it encounters this situation during validation.

2. Incorrect Units

Openbox highlights where your model has inconsistent units, unless you choose not to use units at all. 

Units are shown in red if they appear not to be consistent. This is only a warning and will not prevent Openbox building the model. But Openbox will warn you during validation. If you click ‘Cancel’ at this point, you will get a list of inconsistent units in the Validation issues window. See Deal with units marked in red for more information.

3. Embedded constants

Any numeric values in formulas should be made into separate inputs instead. This is a key source of model error.

The classic example is a tax formula of the form: ‘=B17 * 20%’ where 20% is the tax rate in operation at the time the model was created. If the tax rate ever changes, the formula will be wrong. The formula should be ‘= B17 * A12’, where A12 has the value of 20%.

Openbox enforces this by displaying a warning during validation if any formula contains a numeric constant. You can choose to ignore this 

However, Openbox does allow ‘0’ and ‘1’ as constants in a formula.

4. No repeated names

Each calculation in an Openbox model must have a unique name. You cannot have two calculations called ‘cash’ for example. This avoids errors caused by having two versions of the same calculation in a model. It also forces the modeller to be clear about exactly what an item in the model represents.

5. Circular references

Openbox will identify and report circular references in your model. It will show you the circular calculation, and ask if you want to break the circle at a particular point. See the article on circular references for more detail.
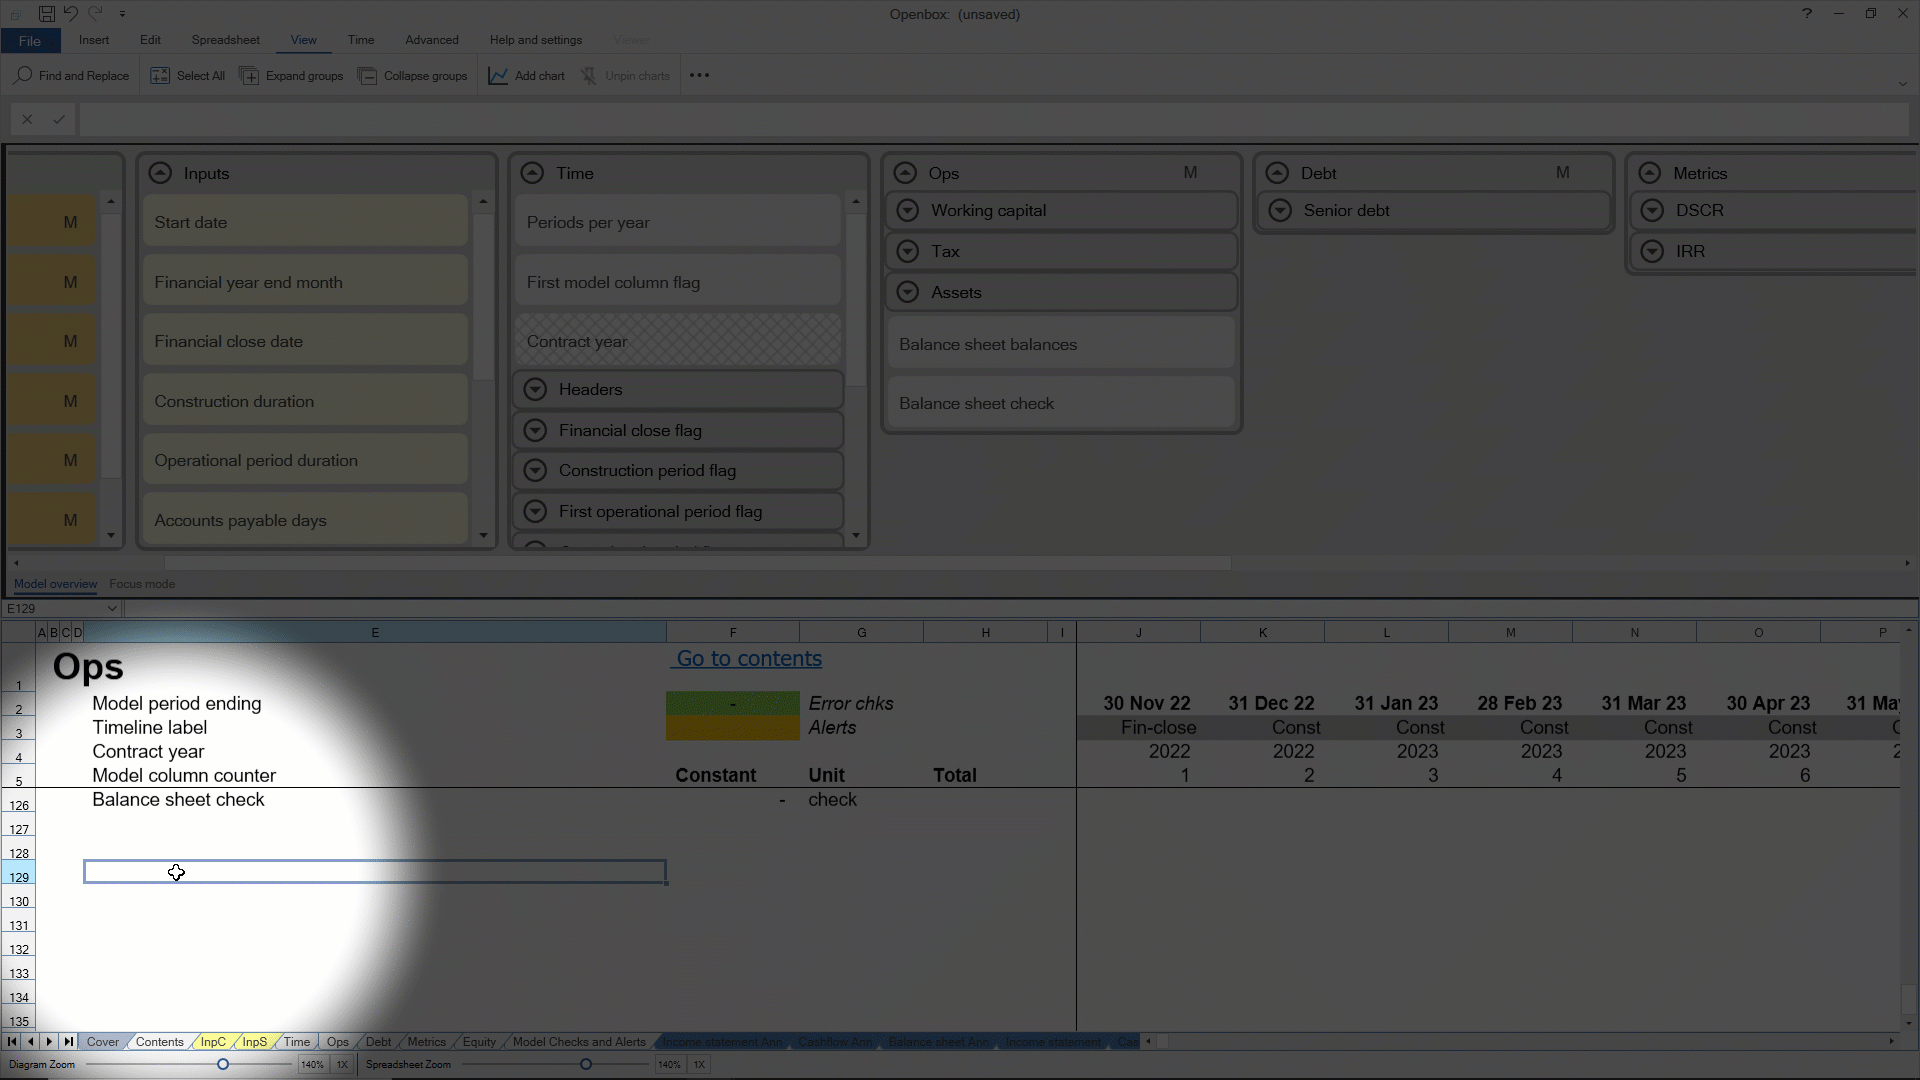
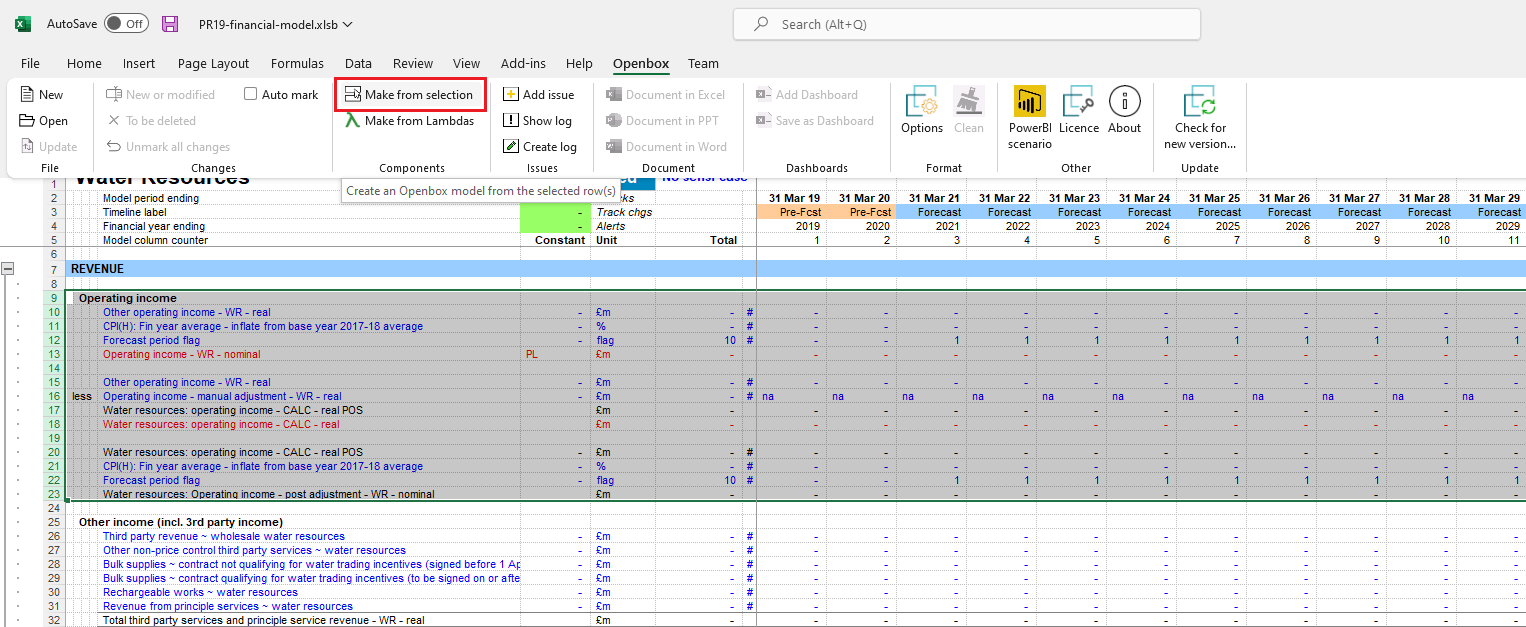
6. Too many headers

All Excel models that Openbox creates for you are based on an Excel template file. That file specifies the number of items that can be in the header rows in each sheet. For example, the standard “Gridlines template.xlsx” that ships with Openbox has four header rows, as can be seen in rows 2-5 of the spreadsheet below.

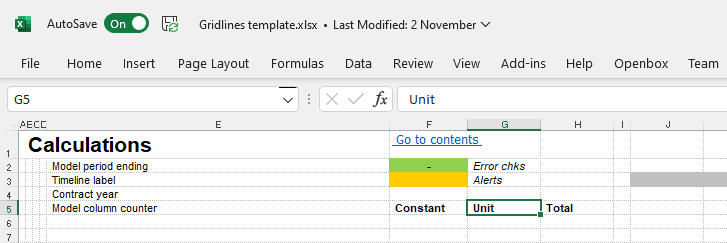
Anything in the ‘Headers’ section of the Time sheet will be put into the header rows. Openbox checks that there are the right number, and warns you if there are too many.

7. All necessary sections and time blocks

There are certain sections that every model should have: an inputs sheet, a time sheet and sections for model checks, alerts and constants. Openbox makes sure that they are included.

It also checks that the model has a start date, model period start and end and other standard time inputs and calculations.

8. Two calculations with very similar names

It’s easy, when creating a model, to add the same calculation twice by mistake. Openbox won’t let you give two calculations exactly the same name, but if you include an extra space or % or dash, it will not warn you right away. 

During validation, it will look for names which are the same except for spaces and symbols, and confirm with you that these are really distinct calculations. You will be given the option to combine them into one, if not.

9. Reports with same name as sheets

Every Openbox report, and every sheet in the main window, will ultimately become a sheet in an Excel model. So you can’t have a report called say “Income“, and an Openbox sheet called “Income” because they would both become an “Income” sheet in Excel. Openbox will warn about this and ask you to change one of the names.

10. Flags that aren’t on the time sheet

All flags, indices and discount rates should be on the time sheet. Openbox doesn’t enforce this while you are working on the model, but it will automatically move them during validation.

11. Copy/ paste blocks not on the optimisation sheet or invalid (different arrays)

In the same way that flags should be on the time sheet, copy/ paste blocks for resolving circularities must be on the optimisation sheet. Openbox will fix this automatically for you.

12. Balances with invalid or unusual formulas

Formulas for balances must include the BEG() function. Openbox will warn you if they won’t.

Balance formulas should also be BEG(), plus some inflows, minus some outflows, possibly with a flag. If they are not of that type, Openbox will warn you, and ask you if you are sure that the formula is correct.

13. Calculations on the input sheet

Separating inputs, calculations and outputs is part of modelling best practice. But it’s easy, when working on a model, to add a calculation to an input and forget to move it off the input sheet. Openbox will automatically move any calculations on the input sheet into “Unallocated“, so you will be notified to move them to the correct sheet or section. 

14. Unused items

All inputs and calculations should be used somewhere in the model – if not, they should be removed to avoid confusion. Openbox will give you a list of any unused items.

15. Empty sheets or sections

Openbox will offer to delete any empty sheets or sections.

16. Adding balances and non-balances

Openbox will warn you if a calculation adds a balance to something that is not a balance. While this is sometimes OK, it often indicates an issue with the model logic.

17. Functions that are applied to the wrong things

Some functions don’t make sense when applied to certain inputs. For example, trying to get the PREVIOUSVALUE of a constant, or using BEG to get the opening balance of something that isn’t a balance, or using an array function on something that doesn’t have arrays.

Openbox will warn you about all of these.

18. Problems with timelines

You can have more than one timeline in an Openbox model, but there are some things to watch for when building multi-timeline models. These include using calculations that are on (say) a quarterly basis in a monthly calculation.

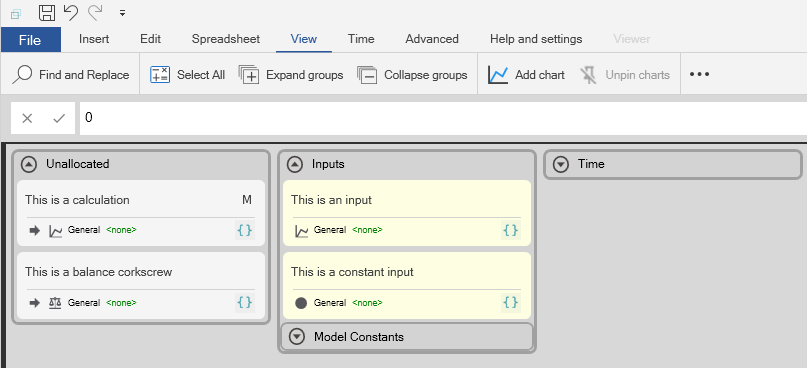
19. Anything unallocated

The “Unallocated” sheet in the main view is intended as a temporary place to put calculations, before they are moved to the right sheet. In the final model, there should not be anything in “Unallocated“. Openbox will warn you if there is. It’s not a major issue while working on drafts, but should be fixed before final release. 

Changing how inputs and calculations are laid out

Click “Help and Settings” then “Openbox settings” to get the main options window, which will allow you to make changes to the way the model looks. 

Other formatting changes can be made through the formatting template, which is discussed in another article. You choose the formatting template in the Options window here:

Excel file format

The ‘type’ input selects the type of Excel file to be created.

You can choose xlsx (a normal Excel file), xlsm (an Excel file which can contain macros) or xlsb (Excel’s binary format, which is smaller than the other two types).

Layout

This section sets how the model will be laid out. 

Input sheet layout

There are two choices: “One sheet” and “Constants scenario”.

One sheet” means that all inputs will be on a single sheet. While this might be a reasonable approach for smaller models, take care with larger models with many different types of input, as it can be confusing.

Constants scenario” will create several input sheets.

One sheet will contain all constant inputs. There will be a scenario selector, and three pre-populated scenarios.

There will then be one or two series input sheets – that is, for inputs that vary over time. There will be one sheet if the model has one timeline and two if the model has two timelines (e.g. monthly construction and quarterly operations).

If you have any inputs that vary by an array – that is, table inputs – they will be inserted on a separate InpT sheet.

Inputs will always be inserted into Excel in the same order as on the Openbox screen.

Report sheet layout

For reports, you can choose either to have all reports on a single sheet “Basic”, or have a separate sheet for each report “By Report”.

Calculation sheet layout

Calculations are always set out in the following way: each list on the Openbox diagram becomes a sheet in your model, and each section within a list becomes a section on the sheet. 

Layout within a sheet

You can adjust spacing between calculations and between calculation blocks. The options are:

  • Spacing between inputs – how many blank rows should there be between each input. The default is 0. Note that there will always be a blank row between each section on the input sheet(s).
  • Spacing between formulas – the number of blank rows between each formula, even if that formula is a local ingredient in a FAST block. In almost all cases, this should be 0.
  • Spacing between blocks – in the FAST standard, each calculation has its ingredients listed in the rows above it. The calculation, and these ingredients, are referred to as a calculation ‘block’. You can specify the number of blank rows to insert between each block here. The default is one.

Finally, there are a number of settings at the bottom of the page that can be ticked or unticked. 

Opening balances together

Text

Each sheet in the Excel model has a number of column headings. These are set on this sheet. You can also customise the text for balances. You can specify prefix or suffix text for the opening balance name, for each flow/ movement in the balance, and for the closing balance line. For example, if you want all opening balances to end with “BEG”, put “BEG” in the “Opening balance text”, “Suffix” box. If you want all closing balances to start with “Closing”, put ‘”Closing” in the “Closing balance text“, “Prefix” box.

VBA

This setting will add a VBA module that you specify to each file – where for example you want to implement Monte Carlo functionality. Note that Openbox does not supply VBA modules except a simple one for solving circular references.

Depending on your Excel security settings[1], adding VBA modules automatically may not be possible, and this option may fail. 

Standards

This sheet allows you to specify that models created using Openbox must follow some or all of the FAST standard. For a full description of the FAST standard, and a discussion of why each option is seen as useful, see http://www.faststandard.org. 

Many of the requirements of the FAST standard are general good practice and are implemented by Openbox as a matter of course, such as copying formulas across a row. A complete list of the FAST requirements, together with Openbox’s approach to them, can be found in Appendix B.

Note that while the first version of Openbox focuses on FAST, future versions will support other good practice modelling standards.

PowerBI

If “Add a table..” is checked, Openbox will add a table to all models. This table will have model values in it, linked to the calculations, and will be in a form suitable for uploading or publishing to PowerBI. The additional options are:

  • Only include items on reports. Self-explanatory; excludes model calculations to reduce size
  • Create separated tables. If you would like separate tables for numbers, dates and text, tick this box.
  • Put results in columns. The standard table has one row per result. If you prefer one column per result, tick this box.
  • Single “varies by” column. By default, the table has one column for each array in the model. If you would like one column for all arrays, tick this box
  • Single column for all values. Values are usually separated into numbers, dates and text. Ticking this box puts them in a single “values” column.

Other

The final page includes the miscellaneous options which do not fit anywhere else. These are listed in the table below.

Other options

Name

Description

Set all inputs to NA

When the Excel file is created, do not use any input values from the Openbox model, but replace them with the NA() function.

This can be useful in ensuring that every input is checked and validated by a domain expert.

Include navigation sheet and icons

Adds a contents page to the model, with clickable hyperlinks to the start of each sheet and section

Autofit columns

Each column will be resized to fit its contents.

Name

Description


Note that there are known bugs in the way Excel autofits columns and so this may not produce a perfect result.

Remove unnecessary sheet references in formulas

Suppose you have a formula in cell E5 on Sheet1 which is = Sheet1!C3. This is the same as = C3, because C3 is on the same sheet as E5. Removing the sheet reference makes the formula shorter, and so easier to read. It also makes it easier to copy to another sheet.

Openbox can automatically remove this type of unnecessary sheet reference for you. 

Auto-save

Automatically saves the current Openbox model every few minutes

When report line is clicked, hide everything else in the calculation view

By default, whenever you click a report line, everything except that report line and its direct precedents are hidden, to allow you to focus on it. You can turn this off by unticking the box.

Show preview in new window

Whether the spreadsheet preview should be in a separate, new, window or whether it should be part of the main Openbox window.

Use manual recalculation in

Excel

All models generated by Openbox will have calculation set to

Manual, if this box is ticked

Allow Openbox to report unexpected errors to Gridlines

Allows Openbox to send information about where an error occurred, and standard information about your system, to Gridlines. This is anonymous.

Add named ranges

Add a named range for each calculation in the model.

[1] ‘Allow access to VBA object model’ needs to be checked in the ‘Trust Center’ in Excel

Make or export a new component from an existing Excel model

Openbox now includes the ability to convert existing spreadsheets to Openbox components. This means that you can base all future models on the best ones you already have. 

First of all, open the Excel file you want to make a component from. You then have two ways to make or export the component.

1.     The ‘Make component’ option

Select the rows you want to read in and click ‘Make Component’. You can select the whole row, or just one cell per row – it doesn’t matter.

Then click “Make from selection” in the Openbox part of the Excel ribbon, as shown in the picture below.

Openbox will read the values, formulas, labels and units in that section and convert them to an Openbox model. If you already have an Openbox model open, the new calculations will be added to that one. Otherwise, a new model will be opened.

2.     The copy and paste option

Select the rows you want to read in, then press Copy. Switch to Openbox and press Paste (Edit-Paste or Ctrl+V). You will be asked to confirm which column in your spreadsheet has which purpose.

The result in both cases will be an Openbox diagram showing a sheet, and a box for each calculation you selected. The picture below shows an example.

You can then create a component by selecting the “Imported” sheet, clicking “Insert”, the three dots, then “Export component”.

Openbox will check it for errors or issues, then ask you for a description. This description will be shown to anyone who uses the component in future, so it should be descriptive and clear as to the component’s purpose.

Openbox will then ask you where it should save the component, and what the filename should be. Once you click OK the component will be saved i.e. exported to disk. You or other can then use it in all future models.

What kind of Excel models can I use?

This process will work for models that follow standard good practice. In particular, there should be one unique formula per row, and each column should have the same purpose on each row. 

The model does not have to be to the FAST standard. Openbox can read FAST models, but it can also read others too, providing they fit the best practice requirements above.

Note that Openbox will validate the model it creates, and warn you of any issues it finds e.g. inconsistent units. This can be a useful validation of your existing models.

In some cases, Openbox cannot read the model even if it is best practice. Typical reasons include:

  • You have used the same label for two or more lines. Openbox doesn’t allow duplicate labels.
  • You have used a complex lookup or INDEX/ MATCH function which looks over several rows.

If it cannot read part of the model, Openbox will tell you what the problem is, and where it is. In most cases, it will still read the rest of the model, and show placeholders for the parts that it could not read. You can then edit these manually in Openbox.

Component best practice

We have found that these rules help you to produce components that are clear, and easy to reuse.

Use SMU rather than currency units

When you bring a component into a model, Openbox will automatically replace ‘SMU’ in the component with the model’s default unit. This means that a component with SMU can work for any currency, making it much more flexible.

Do not use POS or sign switch lines in the Excel you are reading in

Some financial modelling standards use POS and sign switch lines, where a line item is used on a report. But standard components do not contain reports. The line items in a component might or might not be used on a report in any future model. Openbox will insert these lines automatically if needed, so there is no need to put them into a component.

Break circularity using Openbox, not manually

Openbox can recognise and break circular references in a model. If you break circularities by right clicking on an item and choosing “Break circularity”, Openbox will create copy/ paste blocks for that item. When you then import the component into a model, these blocks will be automatically consolidated into the overall model copy/ paste block. This consolidation won’t happen if you create copy/ paste items manually, because Openbox won’t recognise them as copy/ paste items.

Create or change a calculation

Each calculation (or input) in the model is represented by a box in the main part of the screen.

Inputs are in yellow, and calculations are on a white background.

The icons in the lower part of each box show you more information about each item. The balance for example has a small balance icon, whereas “this is a calculation” does not. “This is a constant input” has a dot showing that it is constant, while “This is an input” has a line showing that it is a series that varies over time.

Calculations can either be standard calculations or “Balances”. A balance is a balance sheet item or a stock of something. For example, a company’s cash balance, or its inventory, would be stocks.

Standard calculations are just that: they take some input values and calculate a result. Balances work differently. They take an initial value (an opening balance) and track the flows into and out of it. Those flows add to or subtract from the initial balance. For example, with a bank account, the initial value would be the opening account balance, and the flows would be payments into and out of the account, such as purchases of assets

To decide whether something is a balance, just ask the question: “Would this appear on a balance sheet or inventory”? If the answer is yes, it is a balance. When converting to Excel, Openbox inserts standard corkscrew formulas for each balance.

Creating a standard calculation in Openbox is much like writing a formula in Excel. Simply select the box in the ‘calculation’ window that represents the item you want to write a formula for, then either click in the formula bar at the top of the screen or press F2. Then type the formula you want.

Openbox recognises standard Excel syntax, so you can type a formula that looks similar to one in Excel. The difference is that instead of cell references, there are references to the names of other calculations. It also recognises most common Excel function names, and when you start typing it will suggest from a list of available functions that include the letters you type. If you type ‘I’ for example, it will show you functions such as IF and SUMIF.

The names of the other calculations are shown in square brackets. When you type a left square bracket (‘[‘) you will see a dropdown list of all the other calculations already in the model. As you’ll see in the animation above, if you continue typing, Openbox will search for all items that include the text you type. So, typing ‘cash’ will find all items that contain the word cash or a word containing cash, such as ‘cash balance’, ‘opening cash’, and ‘cashflow’. When you find the one you want, click on it or press ‘Tab’ when only one item remains in the dropdown list.

If you type a name that does not exist already, Openbox will ask you if you want to create a calculation with that name, and whether it should be a constant or not. It will link it to the calculation you are editing. Initially, the calculation will be a placeholder, with no formula. But you can then edit it just like any other.

If you need to add a new placeholder directly, click on the “New Item” button, or press Ctrl+N (N for new). If you want to add a new balance placeholder, click the “New balance” button beside “New item”, or press Ctrl+B (B for balance).

If you want to see how the calculations and inputs will look as a spreadsheet, press F9 to see the preview.