Repeat calculations using arrays
You often want to repeat a set of calculations in your model. Here are some examples:
- You might have several different products and need to calculate revenue by product and total revenue;
- You have several scenarios, and you want to take the minimum and maximum value of some metric (e.g. IRR) over all scenarios;
- You have three main types of asset: buildings, office equipment and other. Each type of asset has a different lifetime, and the purchase/ disposal profile will be different. You need to track capex, depreciation and disposals for each asset type, but report the total on your balance sheet.
Openbox allows you to do this easily.
It’s a two step process. First, write the calculations as if there was only one product/ scenario/ asset class. Then tell Openbox that some of the inputs need to be repeated for all items in an ‘array’ that you define. An array is just a list e.g. “buildings, equipment,other” or “upside, base case, downside”. Openbox will repeat the inputs, and any calculations that depend on those inputs, directly or indirectly. So if you tell Openbox that the input “asset life” varies by type of asset, essentially all the fixed assets section will be repeated three times.
You might be wondering at this point how we stop the model becoming very large. Later in this article we’ll see how to consolidate calculations so that not everything in the model is repeated. But first, let’s look at how to create an array.
How to create an array
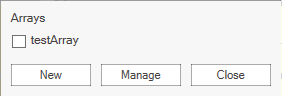
To create an array, click “Manage Arrays” in the Ribbon. You can then add a new array, or edit or delete an existing one.
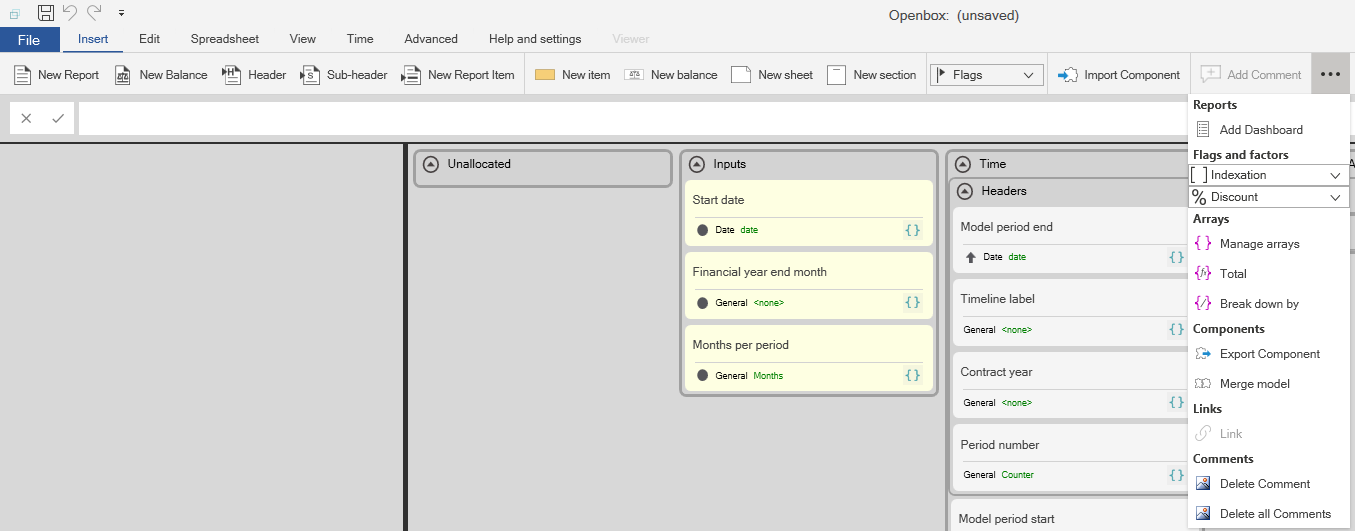
To apply an array to an input, select the input on the diagram and then click the ‘{ }’ icon on it. This will ask you if you want to add a new array to the item, or to manage the existing arrays.
If you click “New”, you’ll see a window like the one below.
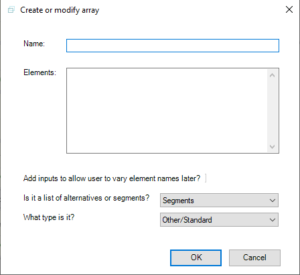
To create a new array, you need to tell Openbox a few things about it:
- Its name. This can be any text
- The elements. This can be a list of text items (e.g. ‘high case’, ‘central case’,’ downside case’) or a series of numbers (e.g. 1:10 represents all the numbers from 1 to 10 inclusive) or dates.
- Whether the elements are numbers, dates or just text (“standard”).
- Whether the elements of the array are ‘alternatives’ or ‘segments’. This affects how they will be shown on reports.
Let’s explain a little more about alternatives and segments. “‘Alternatives” means that the elements are different possible values for the input, but that it does not make sense to add them together. “Segments” means that it does make sense to add them together. For example, a list of scenarios would be alternatives, whereas a list of products would be segments. This is because you could sensibly add together say the revenue for each product to get total revenue but adding together the revenue for each scenario wouldn’t make sense.
Openbox will put all segments on the same report, but will create a separate report for each alternative. So if you have three scenarios (“alternatives”) for say revenue, which appears on the income statement, you get three income statements. But if you have revenue for three business units, which are alternatives, you get the revenue for all three units on the same income statement.
Once you click ‘OK’, Openbox will add the array to the dropdown list. The selected input, and any calculations that depend on it, will now have multiple values, one for each item in the array.
You can add the array to other inputs by selecting the input, clicking the ‘{ }’ and then ticking or unticking the arrays you want to apply.
And once you have added arrays to inputs, that is it. Remember that Openbox automatically works out which other calculations need to vary. For example, if “Asset lifetime” varies by the “Asset class” array, then “Depreciation”, “Net book value” and so on will need to vary too.
This can become complex. Openbox will check and warn, during validation, if it finds any array inconsistencies. In particular, if a balance varies by some array, all the flows into it need to vary by that array too. To give an example, suppose you had three business units and wanted “Cash” to be tracked separately for each one – to vary by business unit. And suppose it is calculated as opening cash plus net cashflow. Then net cash flow would have to be specific to the business unit too – it would have to vary by business unit.
Multiple arrays
You can also combine several arrays in one variable. For example, you might want to split “Revenue” by product, but also by geography, so you can look at US sales of product 1, European sales of product 2 and so on.
To do this, create a “Product” array, say “Product1,Product2,Product3″, and a “Geography” array, say “US,Europe,Asia”. Click on the desired input, “Sales forecast” say, and then ‘{ }’. Make sure both “Product” and “Geography” are ticked.
Now the “Revenue” item will have 3 x 3 = 9 values, one for each possible combination of product and geography. Any items that depend on it will automatically have nine values as well, unless you deliberately ‘consolidate’ an array (see below).
Note that using multiple arrays can quickly lead to a very large number of calculations – use caution!
Consolidating values across an array
Often when you have scenarios or arrays, you want to combine or compare the values in some way. You might want to sum revenue by product line to get total revenue, or to look at the minimum NPV achieved across all scenarios.
To do this, use the special functions SUMOVER, MAXOVER, MINOVER and MEANOVER. The first argument is the array you want to take the sum, max, min or average over. The second argument is the variable you are summing/ maxing/ mining. For example “SUMOVER([revenue by product], “product”)” is the total revenue across all product lines.
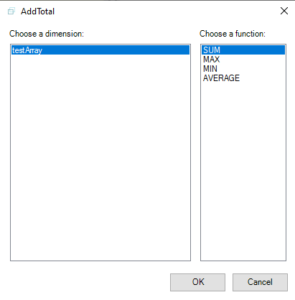
The easiest way to do this is to select the item you want to consolidate, and then click “Insert”, three dots for the advanced menu, then the “Total” button . This will ask you how you want to consolidate, and then will add a new calculation block that does the consolidation.
You can also go the other way by clicking the “Break down by” button, which is beside the Totals button. This takes an existing calculation and allows you to make it vary by array. Here’s how it works:
- Select the calculation. For example, select “Fixed assets”
- Click “Break down by”
- Select the array you want to break down by.
- You’ll be asked how you want to consolidate the array – usually, by SUMming.
- Openbox will then work out what the inputs are that affect “Fixed assets”. At least one of them must vary by the array you specified in step 3, if Fixed Assets is to vary by that array. Tick the input(s) that vary by this array and click OK.
- Openbox modifies the inputs as specified. It also adds a new calculation that works out Fixed Assets for each member of the array you chose, and sets “Fixed Assets” to be the consolidation of those items.