Quick Start – building your first model
This is a walk through to show you how to build a simple project finance model using Openbox.
OpenBox is designed to be flexible, but for creating new models we find that a four stage process works well:
- Choose the TYPE of model
- IMPORT components to do the main calculations
- CUSTOMISE for things that are very project or client specific
- Send the model to EXCEL
Stage 1: Type of Model
Open Excel and click “Openbox” then “New”. You will see a dialog like the one below.
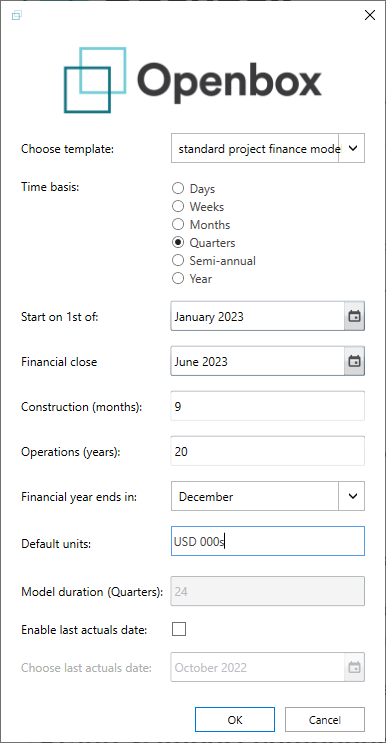
Click on the “Template” dropdown and choose “standard project finance model.obz”
Then type “USD 000s” in the “Default units” box, and set the start date to January 2023, financial close to June 2023, construction duration to 9 months and operations duration to 20 years. Click “Quarters” under “Time basis“. Then click OK.
The main Openbox screen will appear. You can then move on to the next stage – importing components.
Stage 2: Import components
Let’s make this a solar PV model. To import a component, click “Ctrl+i“. You should see a screen like this.
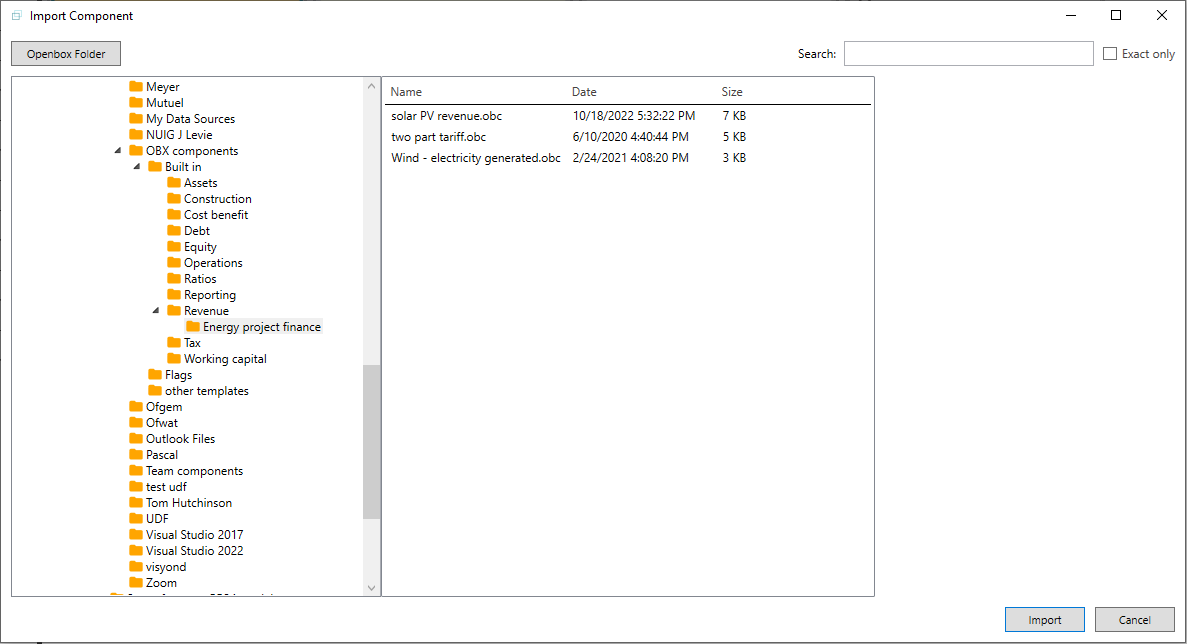
Click the “Openbox folder” button at the top. Then select the “Built in” directory, then “Revenue” then “Energy project finance”. Select the “solar PV revenue.obc” file and click “Import”.
You will then see another screen like this:
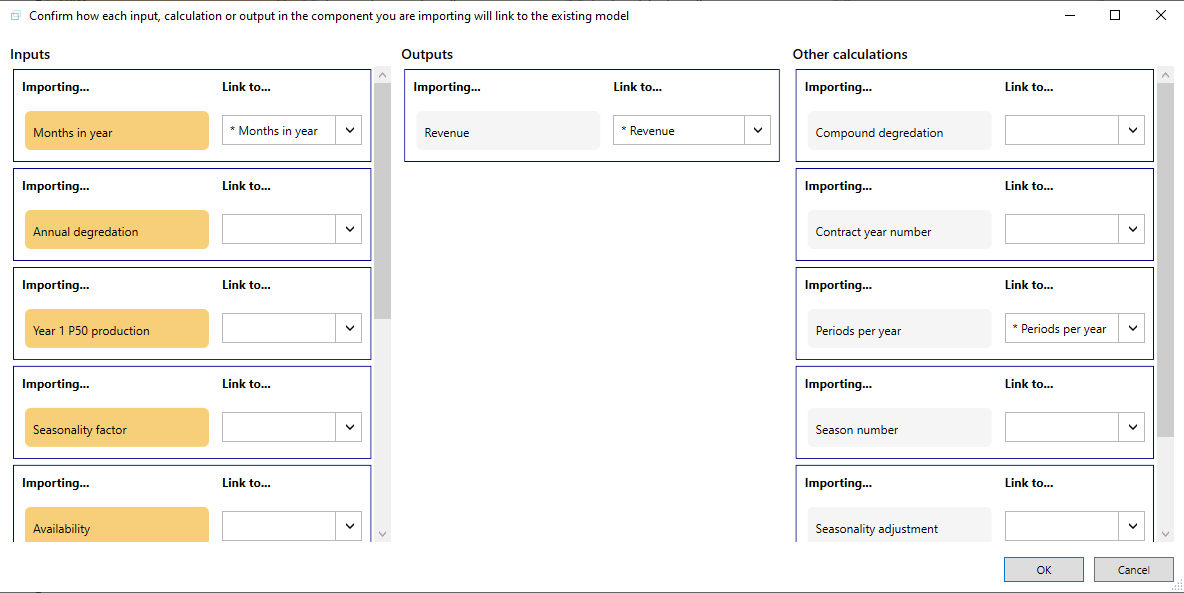
This is asking how to link the component to the existing model. We’ll discuss it in more detail another time – just click “OK” for now.
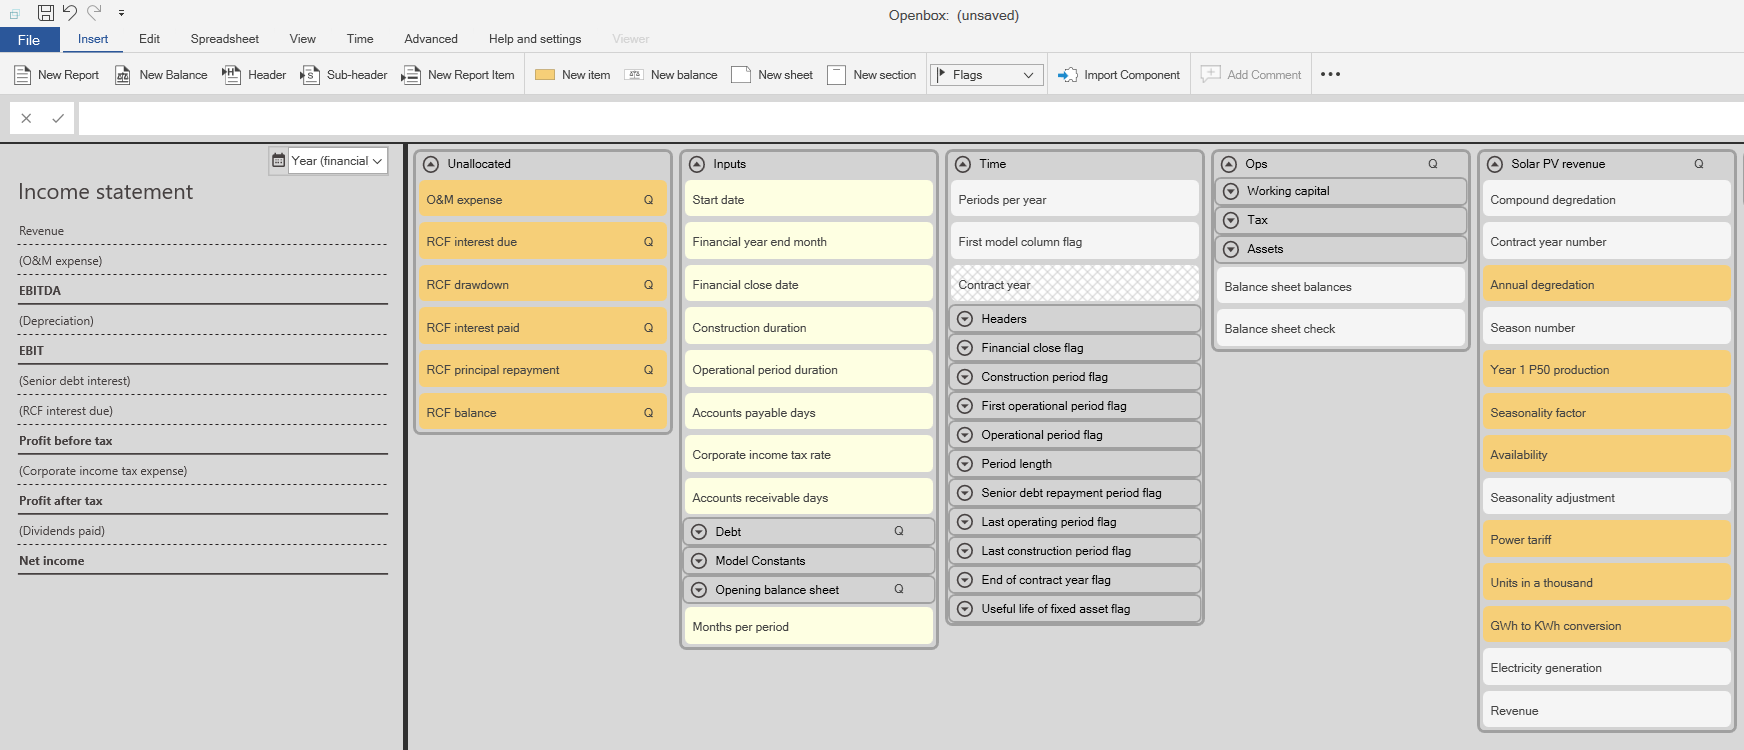
You’ll see that “Revenue” has disappeared from our “Unallocated” list, and there’s a new list on the right hand side. The “Revenue” calculation is now at the bottom of that list. The screen should look something like this:
Now click “Ctrl+i” again, then select the “Built in” folder, then “Operations” then “Project finance” and select the “simple fixed opex.obc” file. Click “Import” then “OK” at the next window.
Finally, the revolving credit facility. Click “Ctrl+i” again, then select the “Built in“, then the “Debt” folder, then the “RCF.obc” file. Click “Import” then “OK“.
That deals with almost the whole “Unallocated” (there’s one opening balance, which we can ignore for now), so now we can move on to customisation.
Stage 3 – Customisation
Let’s suppose we want to set the RCF interest rate. Go to the top of the RCF list on the screen and click “All in RCF annual interest rate”.
Typically, an interest rate will be a base rate plus a margin. Let’s do that here.
Press F2 to go to the formula bar, just like in Excel. Type “[RCF base rate] + [RCF interest margin]“. Press Enter.
Now RCF base rate and RCF interest margin are not in the diagram yet. Openbox will ask you if you want to add them. Note that you can say “Yes, always” and Openbox will do this automatically in future. For now, just click “Yes”.
Next it asks you if you want the base rate to be a constant. Let’s suppose not – maybe we expect it to increase in future. Click “No“.
And the same question for the margin. Let’s suppose that this is fixed. So click “Yes“.
Let’s tidy up by moving any remaining placeholders to the units sheet. Click “Edit” then the three dots “…” and then “Placeholders to inputs“.
And let’s tidy up the units by applying the default units to anything that doesn’t already have units.
Click the three dots again, then “Apply default” and “To entire model“.
Now all that remains is to tell Openbox to translate the model to Excel.
Click “Spreadsheet” menu, then “Build Model“.
We haven’t saved the model yet, and we need to do that before building. So Openbox asks us for a name to save it under. Type a name for the model e.g. “Quick start model v1” and press “Save“.
Openbox will pop up a few messages alerting you to various possible issues with the model. We can ignore them for this quick start, so just click “OK” to any messages that appear. For more information, see What checks does Openbox do as part of validation?
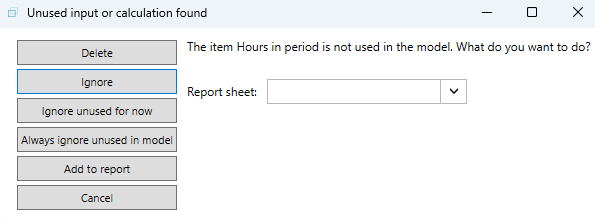
You’ll also see a message saying “Unused input or calculation found”. Again, for a real model, we’d want to check this out, but just click “Ignore unused for now“.
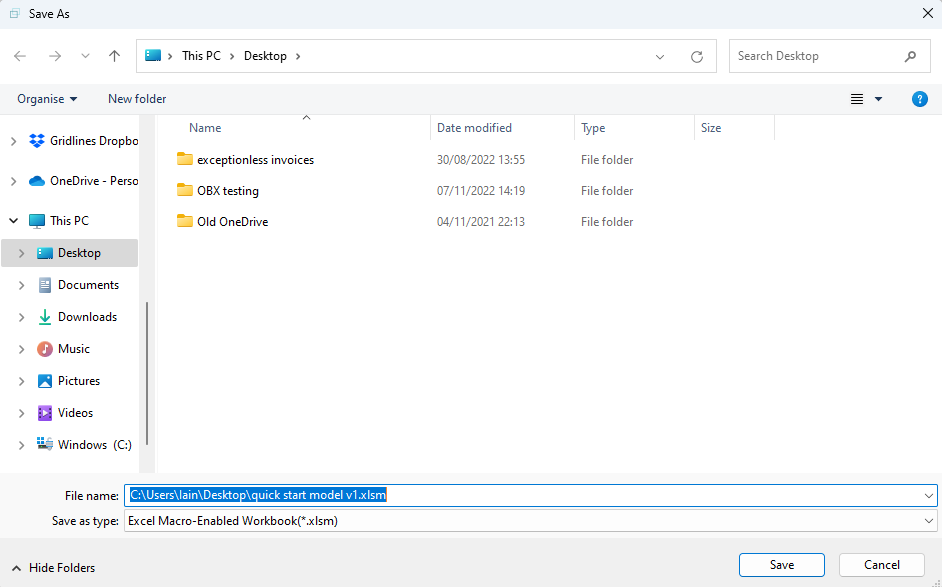
Once Openbox has done all its pre-build checks, it will ask you for a name for the Excel file. It will suggest a name but you can make it anything you like.
A progress bar will appear, showing the steps Openbox takes to create your Excel model, and then the model will appear in Excel.
Because Openbox needs to communicate with Excel during this process, we recommend that you don’t work in Excel while Openbox is building the model.
Once the model appears in Excel and the progress bar disappears, the Excel model is ready for use. You can use it just like any other Excel model.